
How I Transfer My Drawings to Watercolour Paper
Over time, and after watching different painting techniques, I came up with my own way to transfer my drawings to watercolour paper. While I’m sure other people developed a similar technique, I don’t know anyone who works exactly this way, so I ended up having to explain how I do it a few times… And besides being difficult to explain in words, it can also get a little confusing, but it becomes very clear with photos. So today, I took pictures of my process to share this tutorial with you.
It’s a simple, effective, and smart way to transfer a finished drawing onto a block of watercolour paper for painting, minimising unnecessary steps and taking advantage of the derived products of this process.
What You’ll Need
Let’s start with materials. What allows me to minimise steps is the use of both a light table and tracing paper. Here’s everything I am using:
A light table (must be larger than your drawing)
Tracing paper (also has to be larger than your watercolour block)
A graphite mechanical pencil with a 0.5mm lead
One colour pencil
Artist’s tape to keep things in place
We’ll also do a little bit of cutting for the final part of this tutorial. This is optional, but for that, you’ll need:
An exacto knife (or a box cutter if you don’t have one)
A cutting mat
A cutting ruler (this is a ruler that has metal reinforcement to prevent your blade from cutting into it)
Drawing Transfer Tutorial
The point of my technique is to transfer the drawing without taking the watercolour sheet off the block (so I don’t have to stretch it), and without tracing the original drawing more than once, as is typically done when using tracing paper alone. As a bonus, I like to reuse my tracing paper as a protective mask for my watercolour paper, so I’ll show you how I do that as well.
Transferring Your Drawing to a Watercolour Paper Block
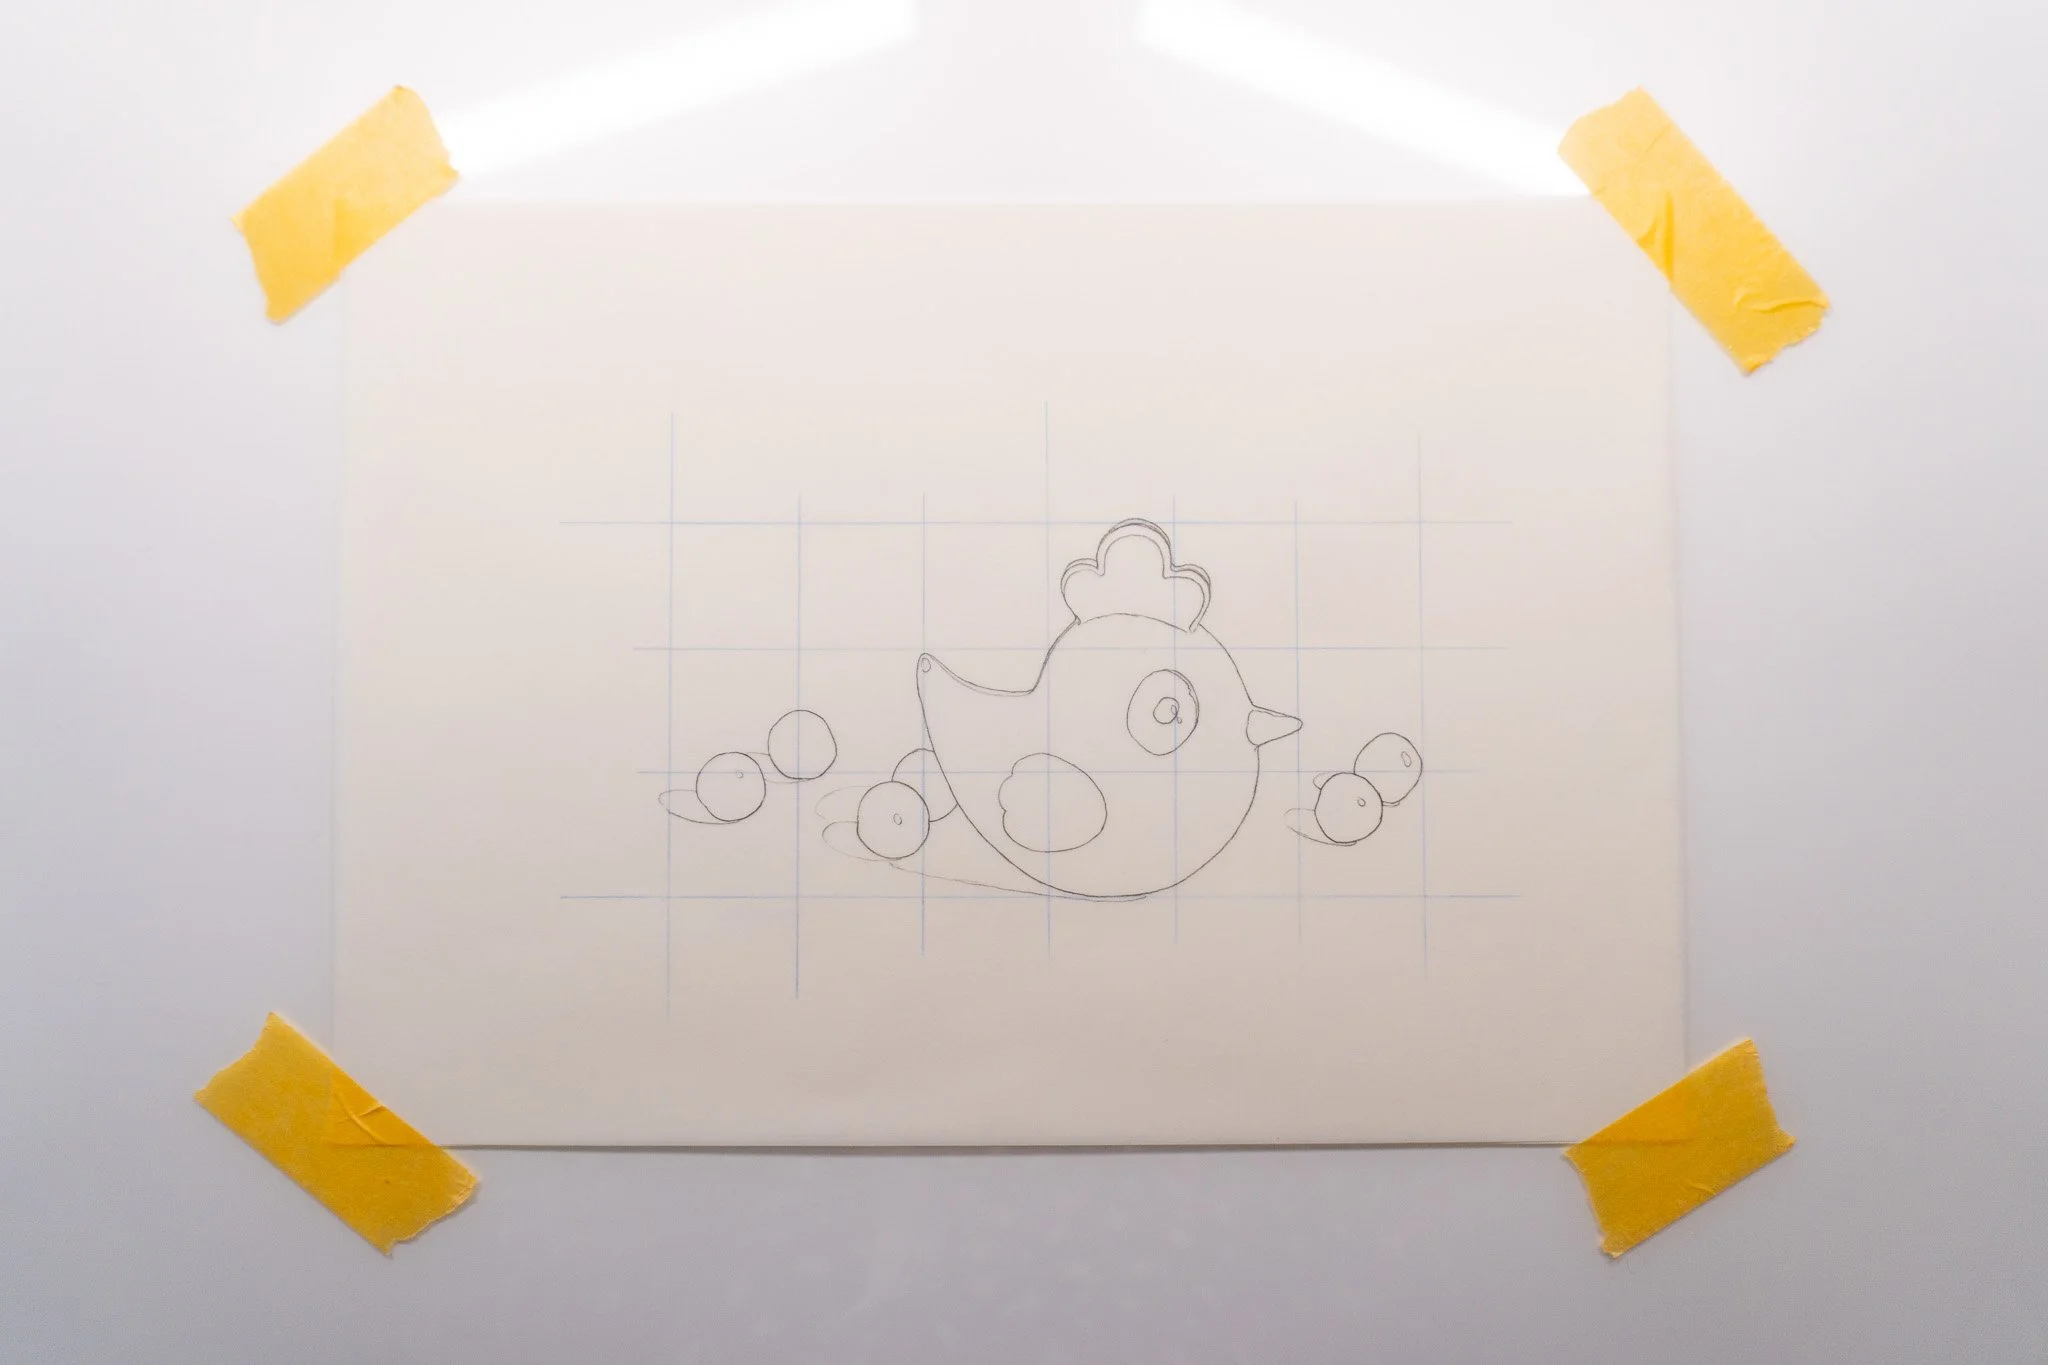
For my food illustrations, I like to resolve my drawings on sketching paper, which allows me to sketch more freely and erase as much as I like, without worrying about preserving the paper or even where to place my subject on the page yet.
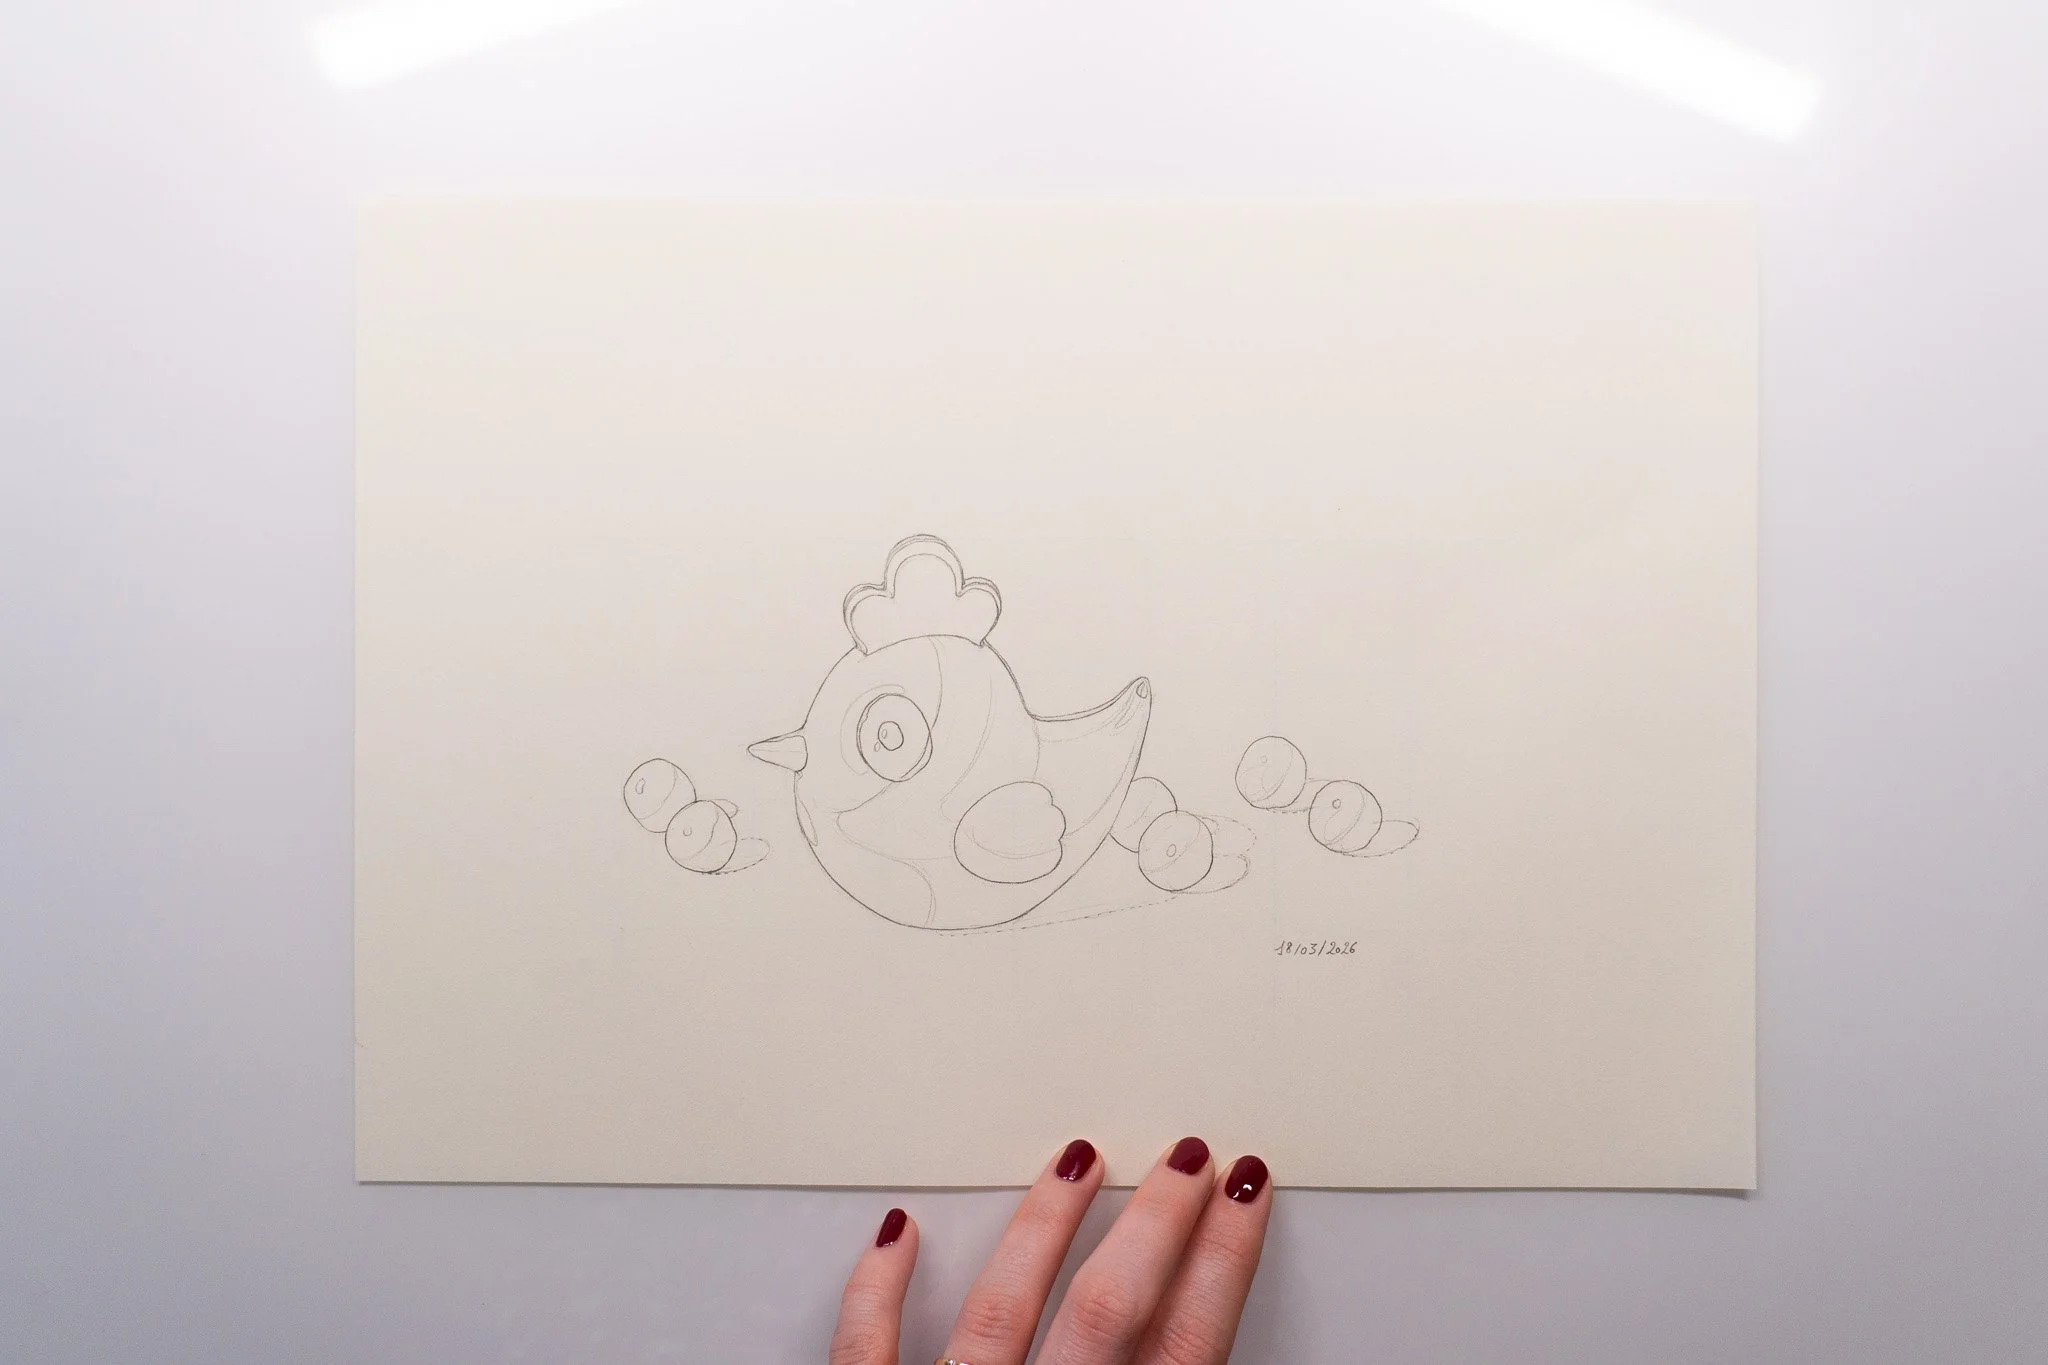
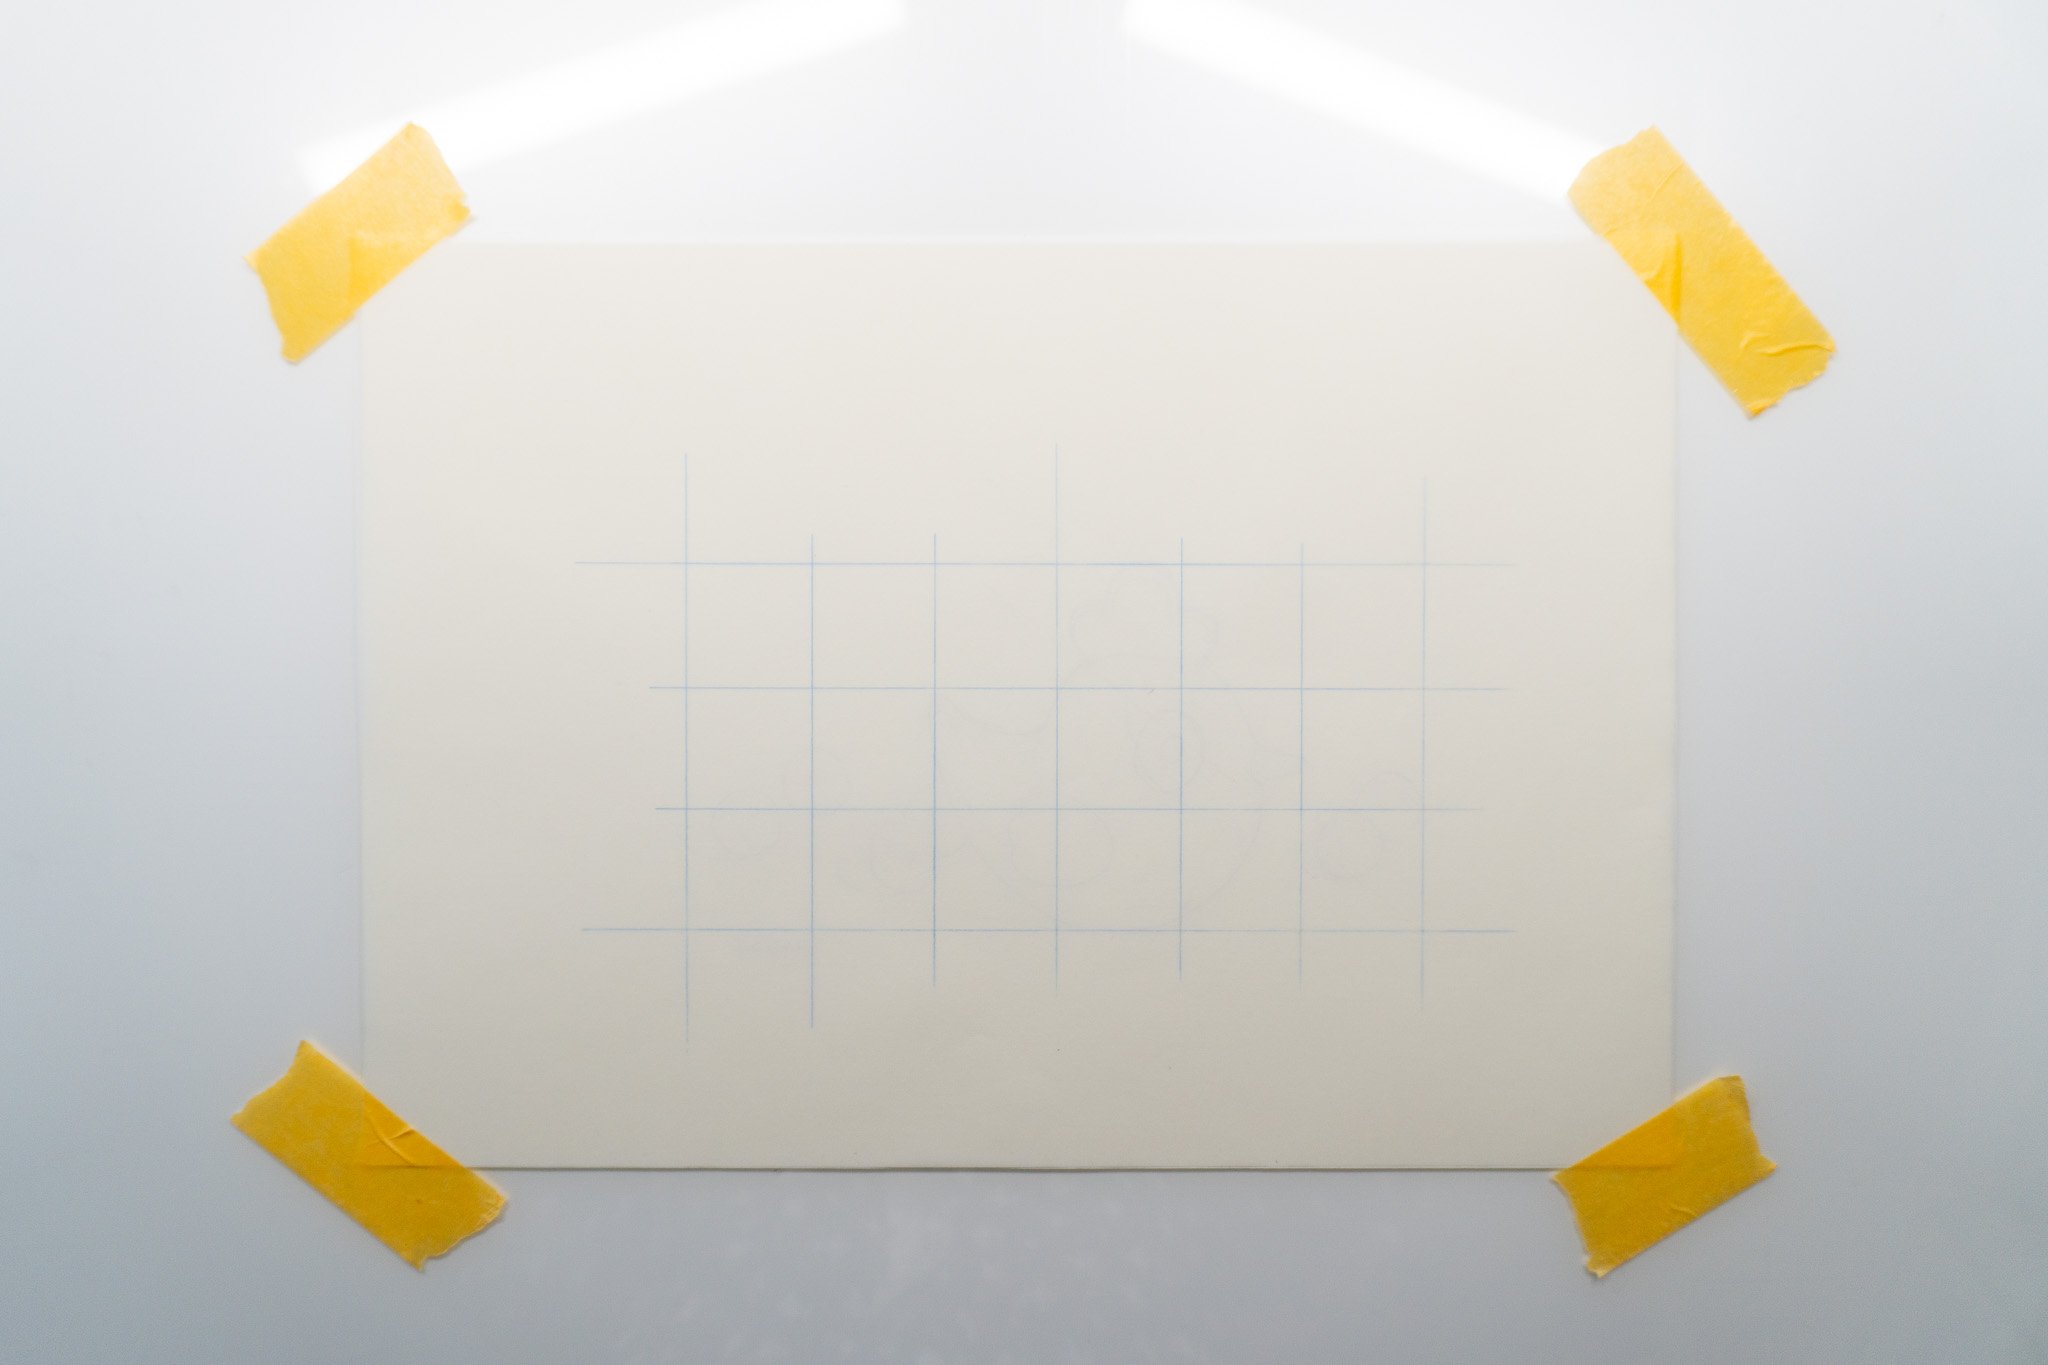
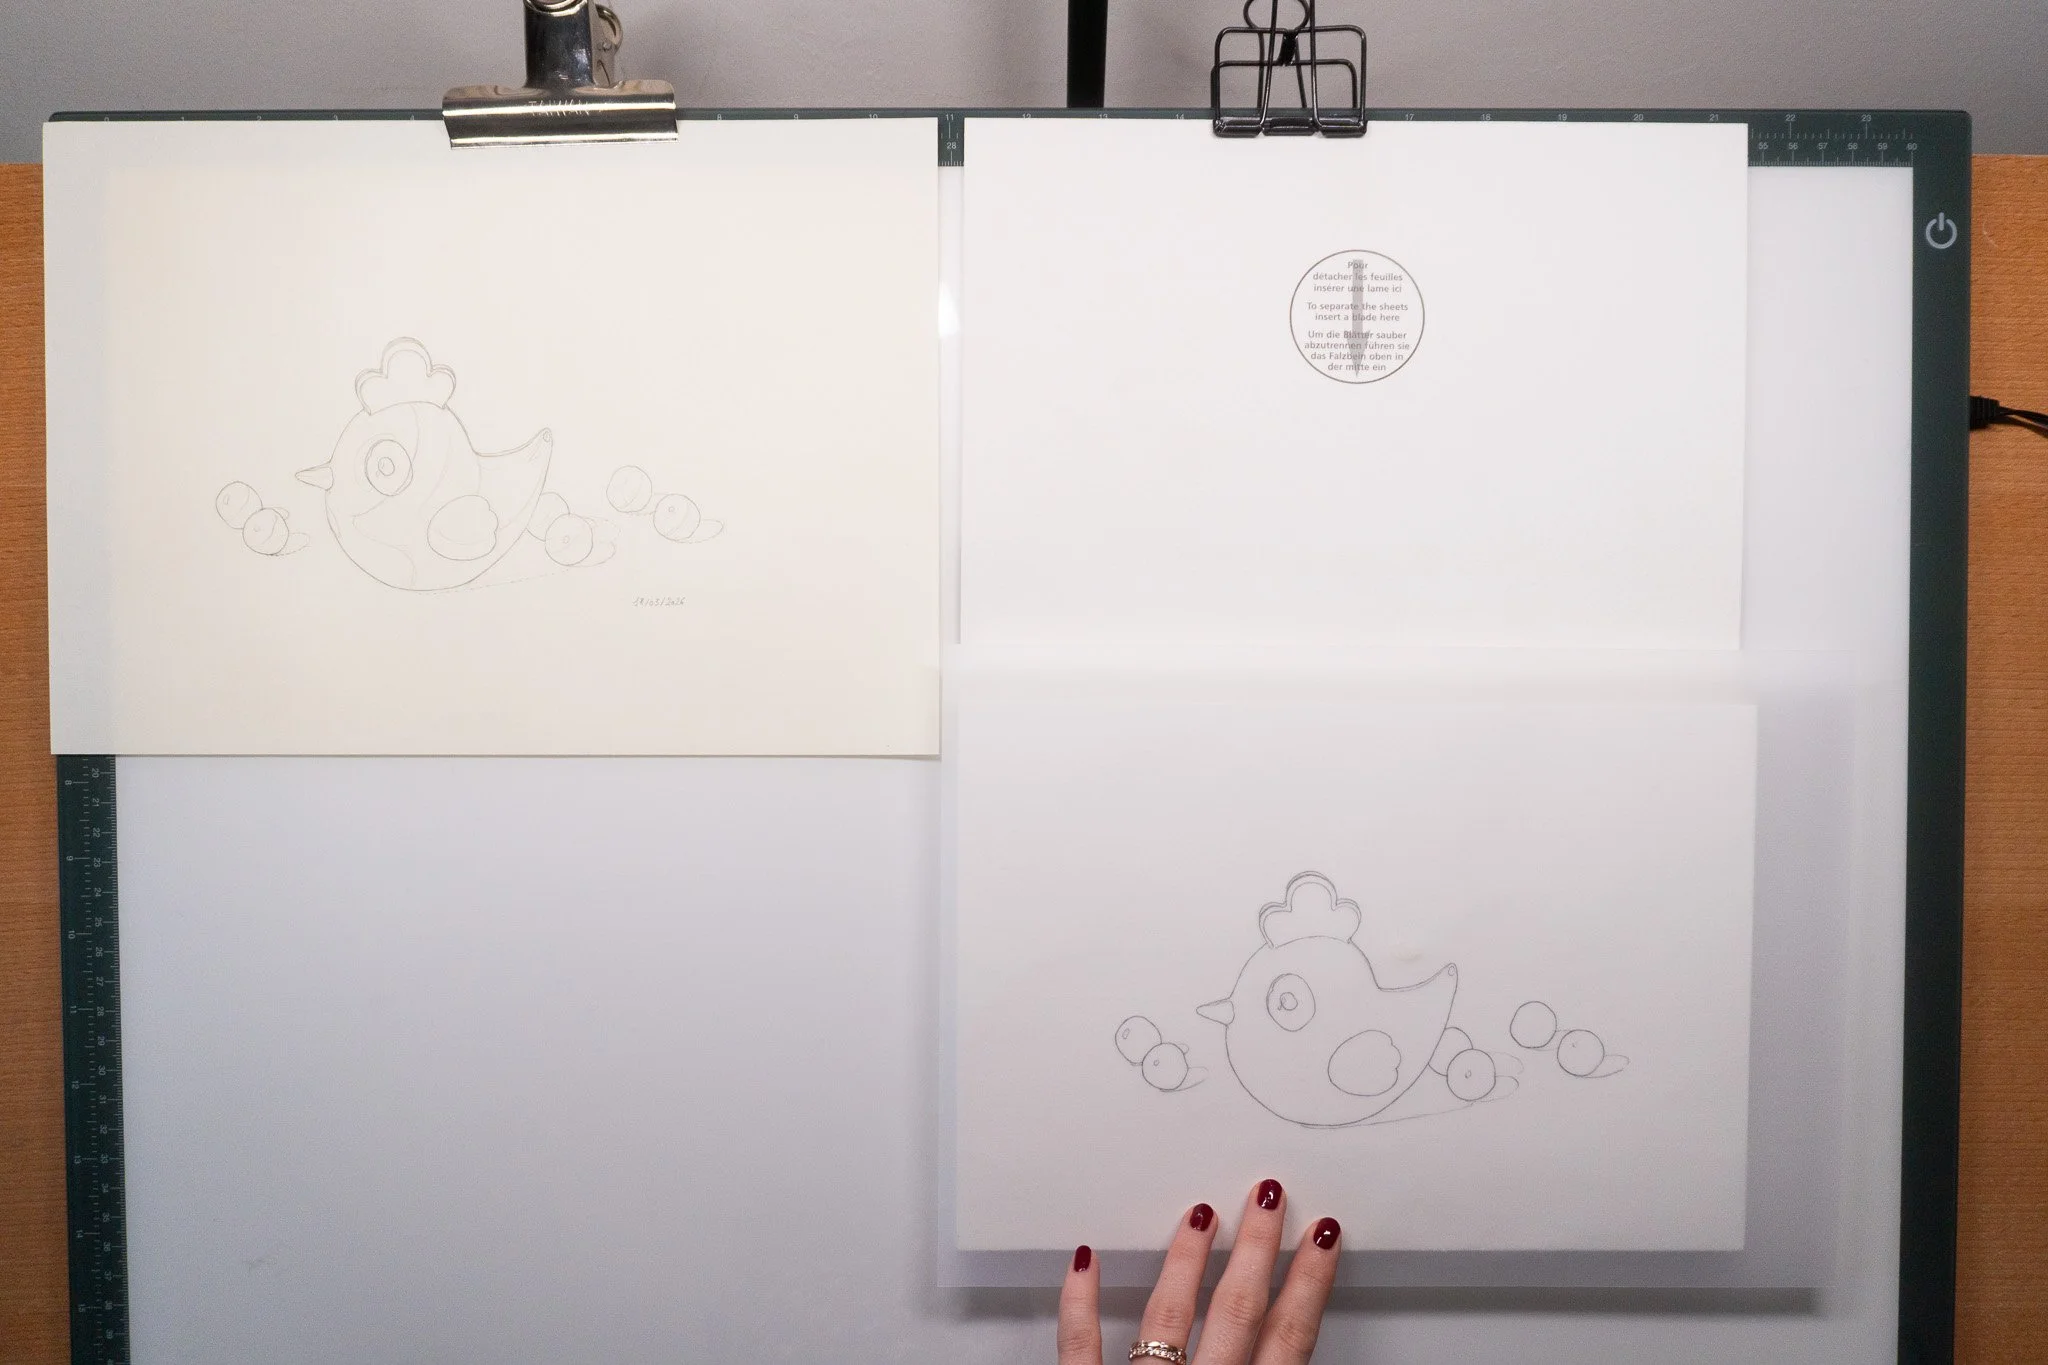
Above, you can see my drawing, where the chocolate chicken is facing left. My first step is to tape this drawing with tracing paper on top, the drawing facing down (the right side of the drawing is against the light table). The second picture shows my tracing paper sheet and drawing taped together on the light table: with the light off, you can only see the back of my drawing. The back happens to have a grid on it, which I use for my drawing process, but we’ll ignore for today’s purposes.
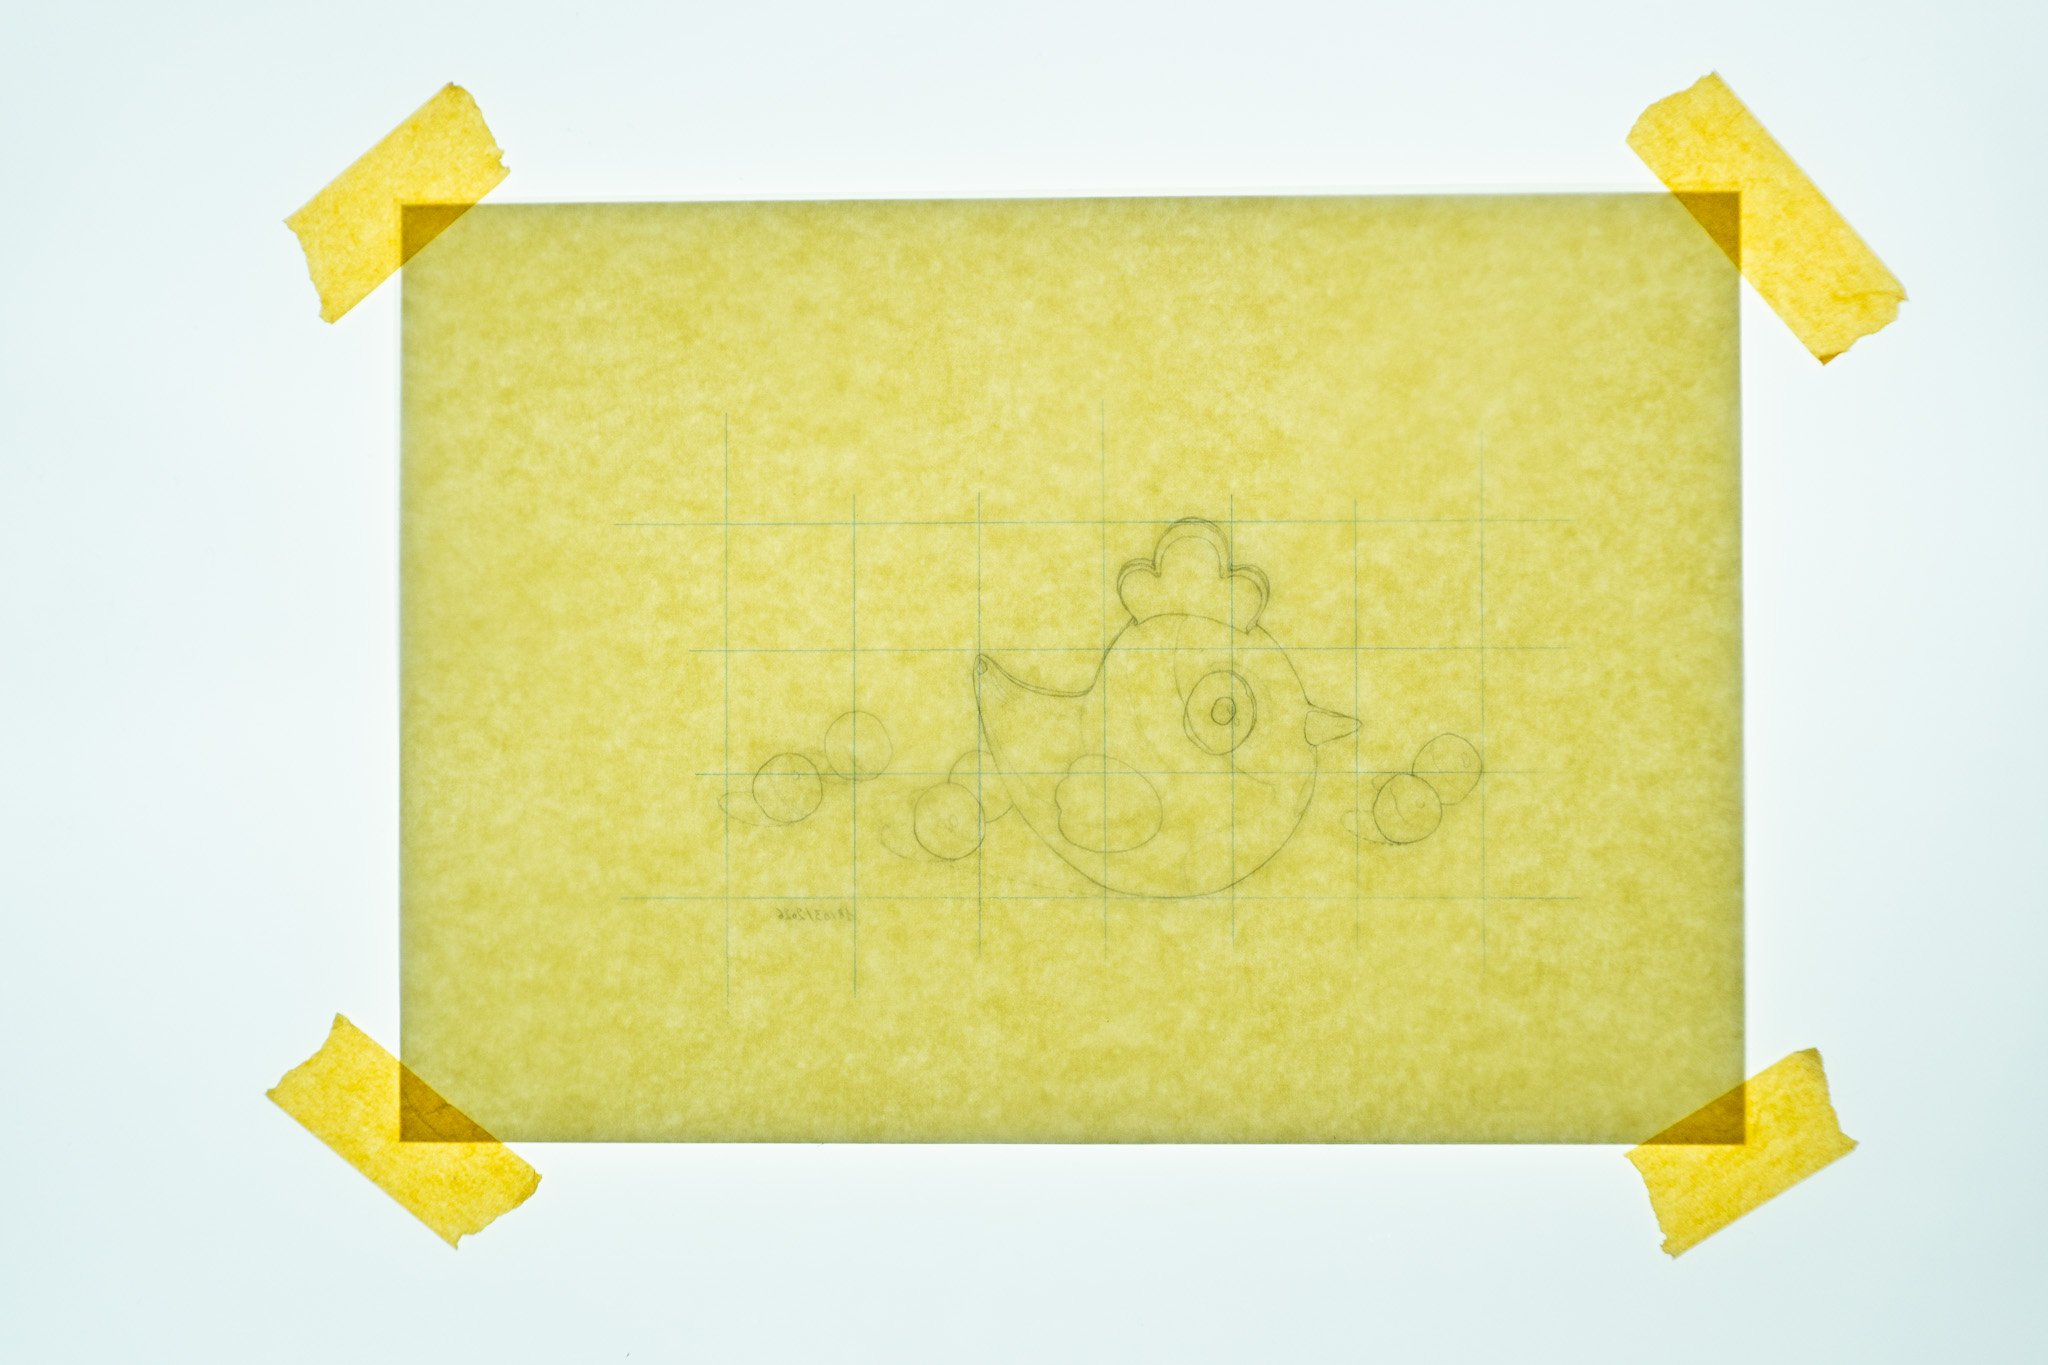
On the last photo, you can see what it looks like with the light on: my drawing appears through the paper. It is inverted, with the chocolate chicken facing right.
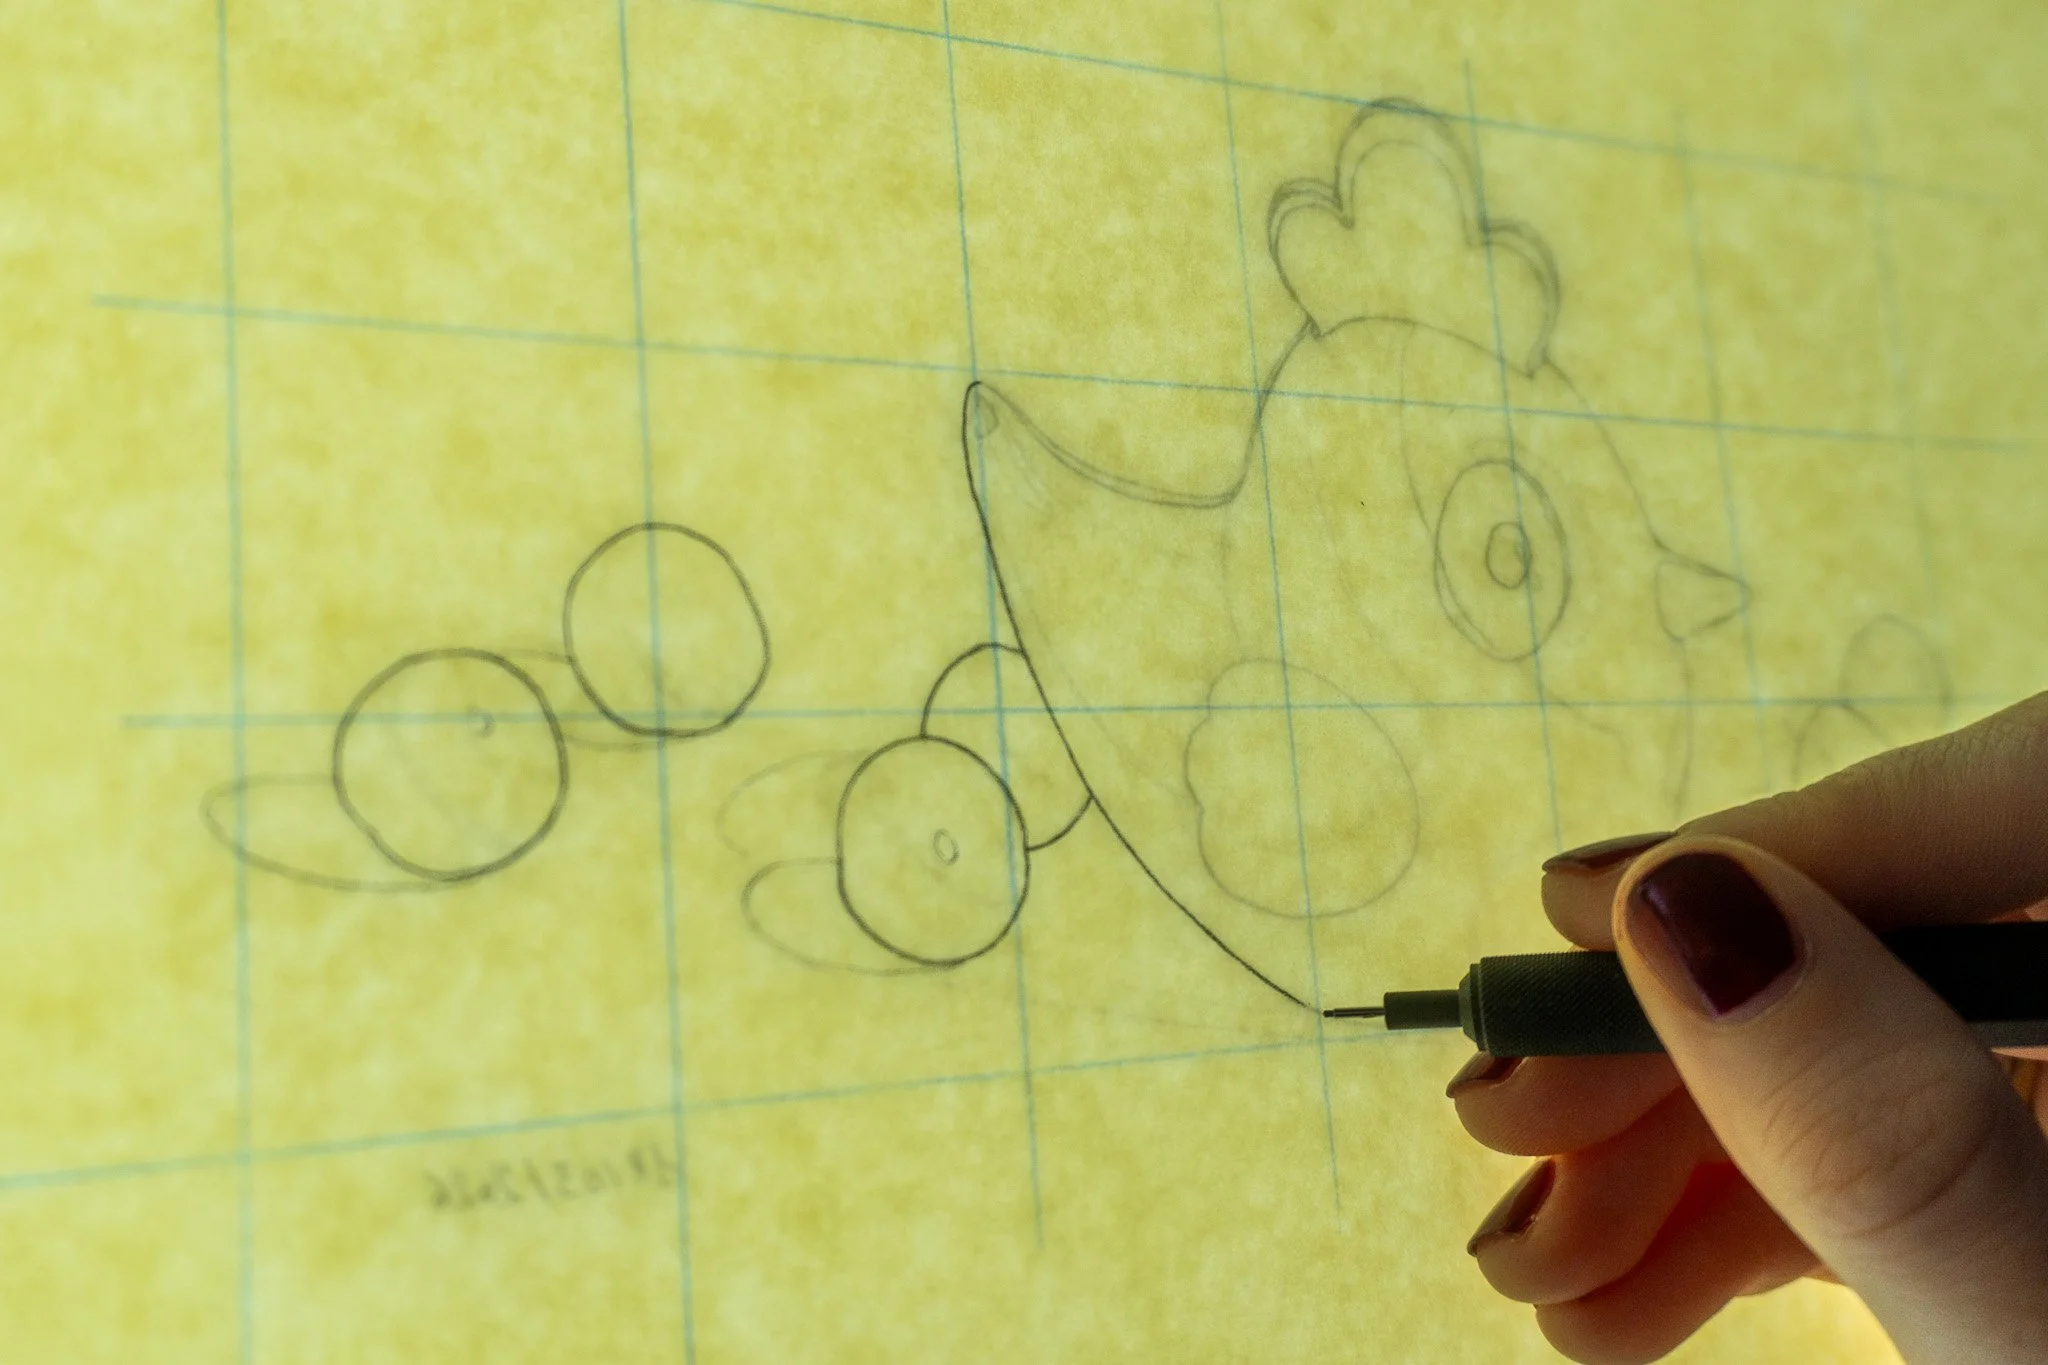
With the light on, I can then trace my reversed drawing. I won’t trace all the lines of my drawings, but only the outlines that I’ll need for painting. Because this process preserves the original drawing, I will be able to reference it in the future, so some of the lines I have drawn are indications for myself and not meant to be transferred.
One important thing about this step is that I trace from the top left to the bottom right: moving towards my dominant hand to avoid smudging. Tracing paper is meant to smudge easily, because the material you are putting on it is supposed to be transferred to another surface. Because of this, you want to be extra mindful of not touching the lines you drew. If you are left handed, you’ll proceed from right to left.
Placing the tracing paper over my watercolour block
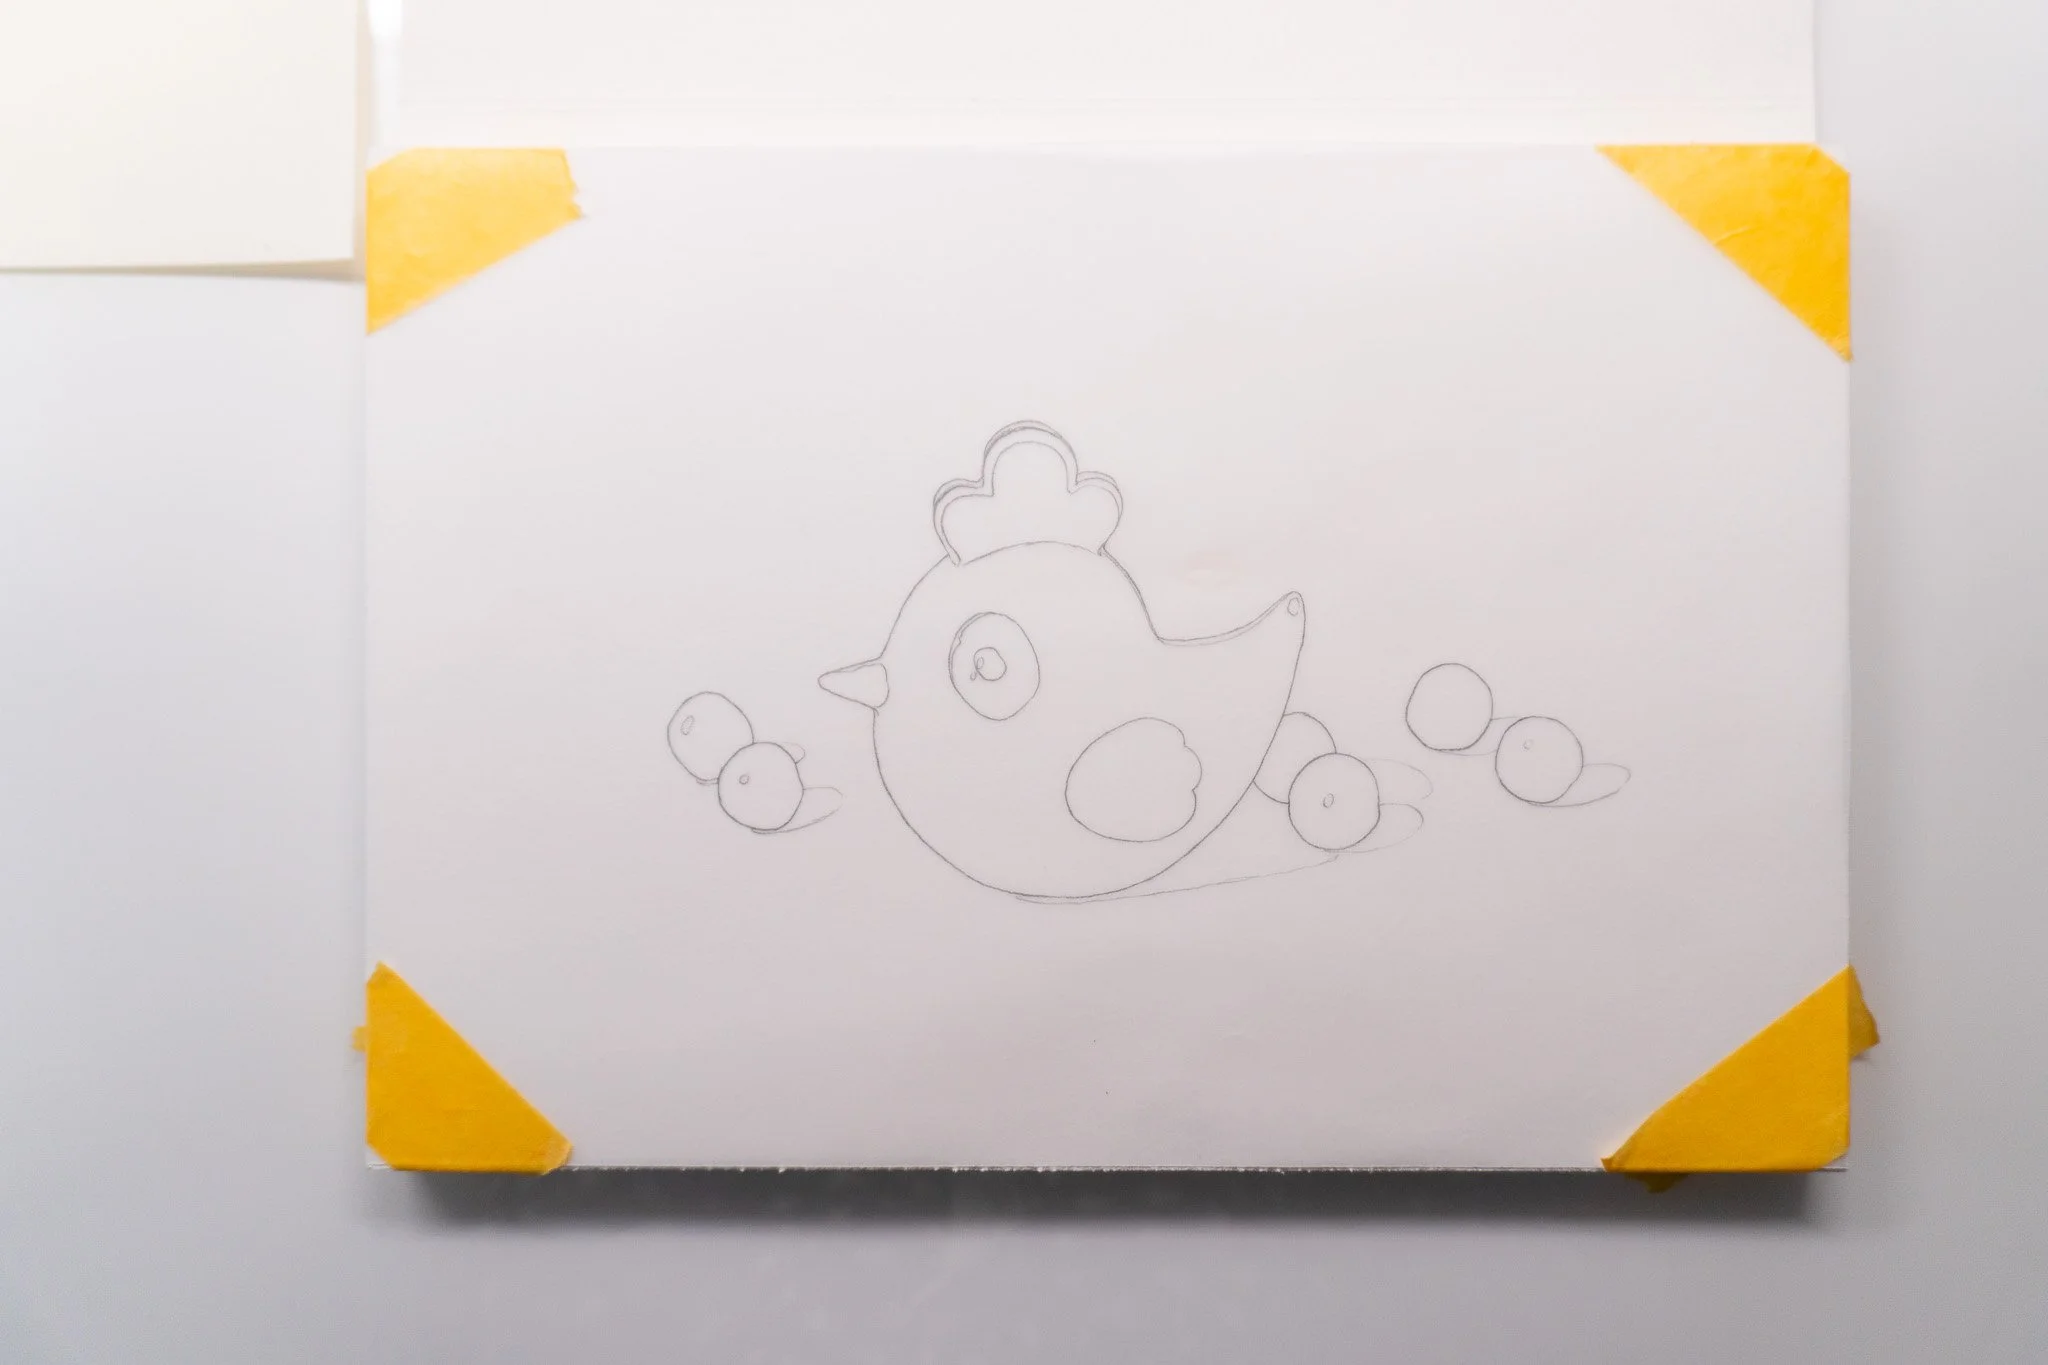
Once all the outlines I want to transfer are traced, I can flip my tracing paper (the side I drew on will now be facing down) and place it over my watercolour block. At this step, I have an opportunity to adjust my composition and place the drawing just in the right place. As you can see in the picture above, my initial drawing and the image on the tracing paper are now in the same orientation.
Once I am pleased with the placement of my image on the watercolour block, I will mark the corners of my watercolour block on the tracing paper. This is to allow me to cut the tracing paper to the exact size of my watercolour block, which will make it easier to tape it in place and also serve another purpose later on.
Once my tracing paper is cut to the exact size of my block, I can fix it in place using tape at the corners. It’s important to have it nicely fixed to avoid it shifting during the transfer.
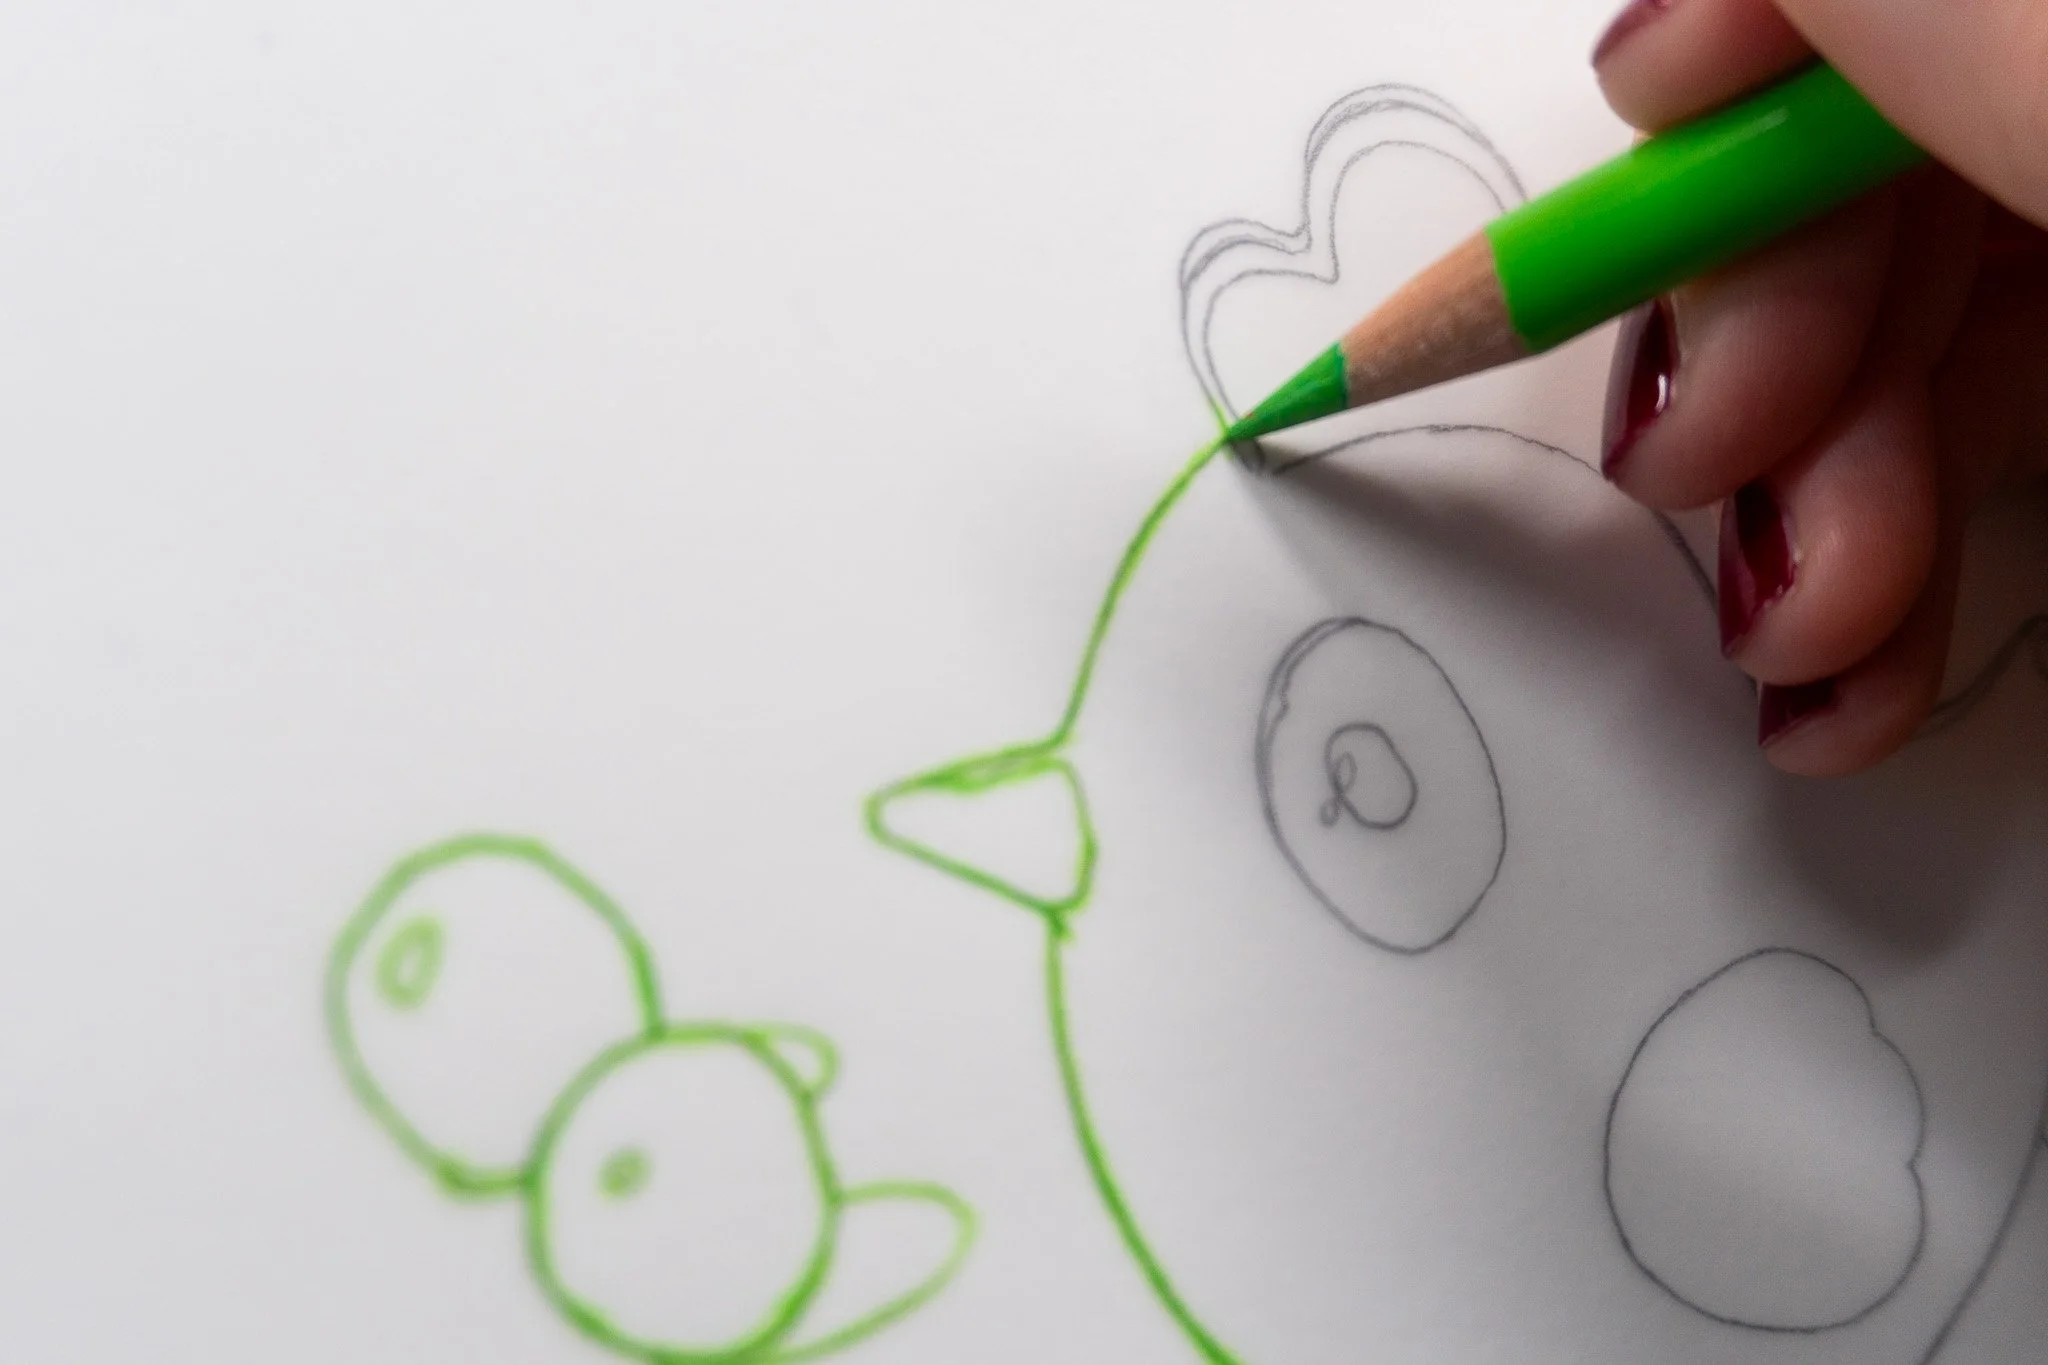
To transfer the graphite that is on the other side of the tracing paper (against your watercolour paper), you want to go over the lines and push it with a tool. That tool doesn’t have to create a mark, but I like using a colour pencil for this because it allows me to see easily what has already been transferred, and the lines I still need to go over. You don’t have to do this very precisely, but taking your time and going right over the line is often more efficient than being fast and sketchy.
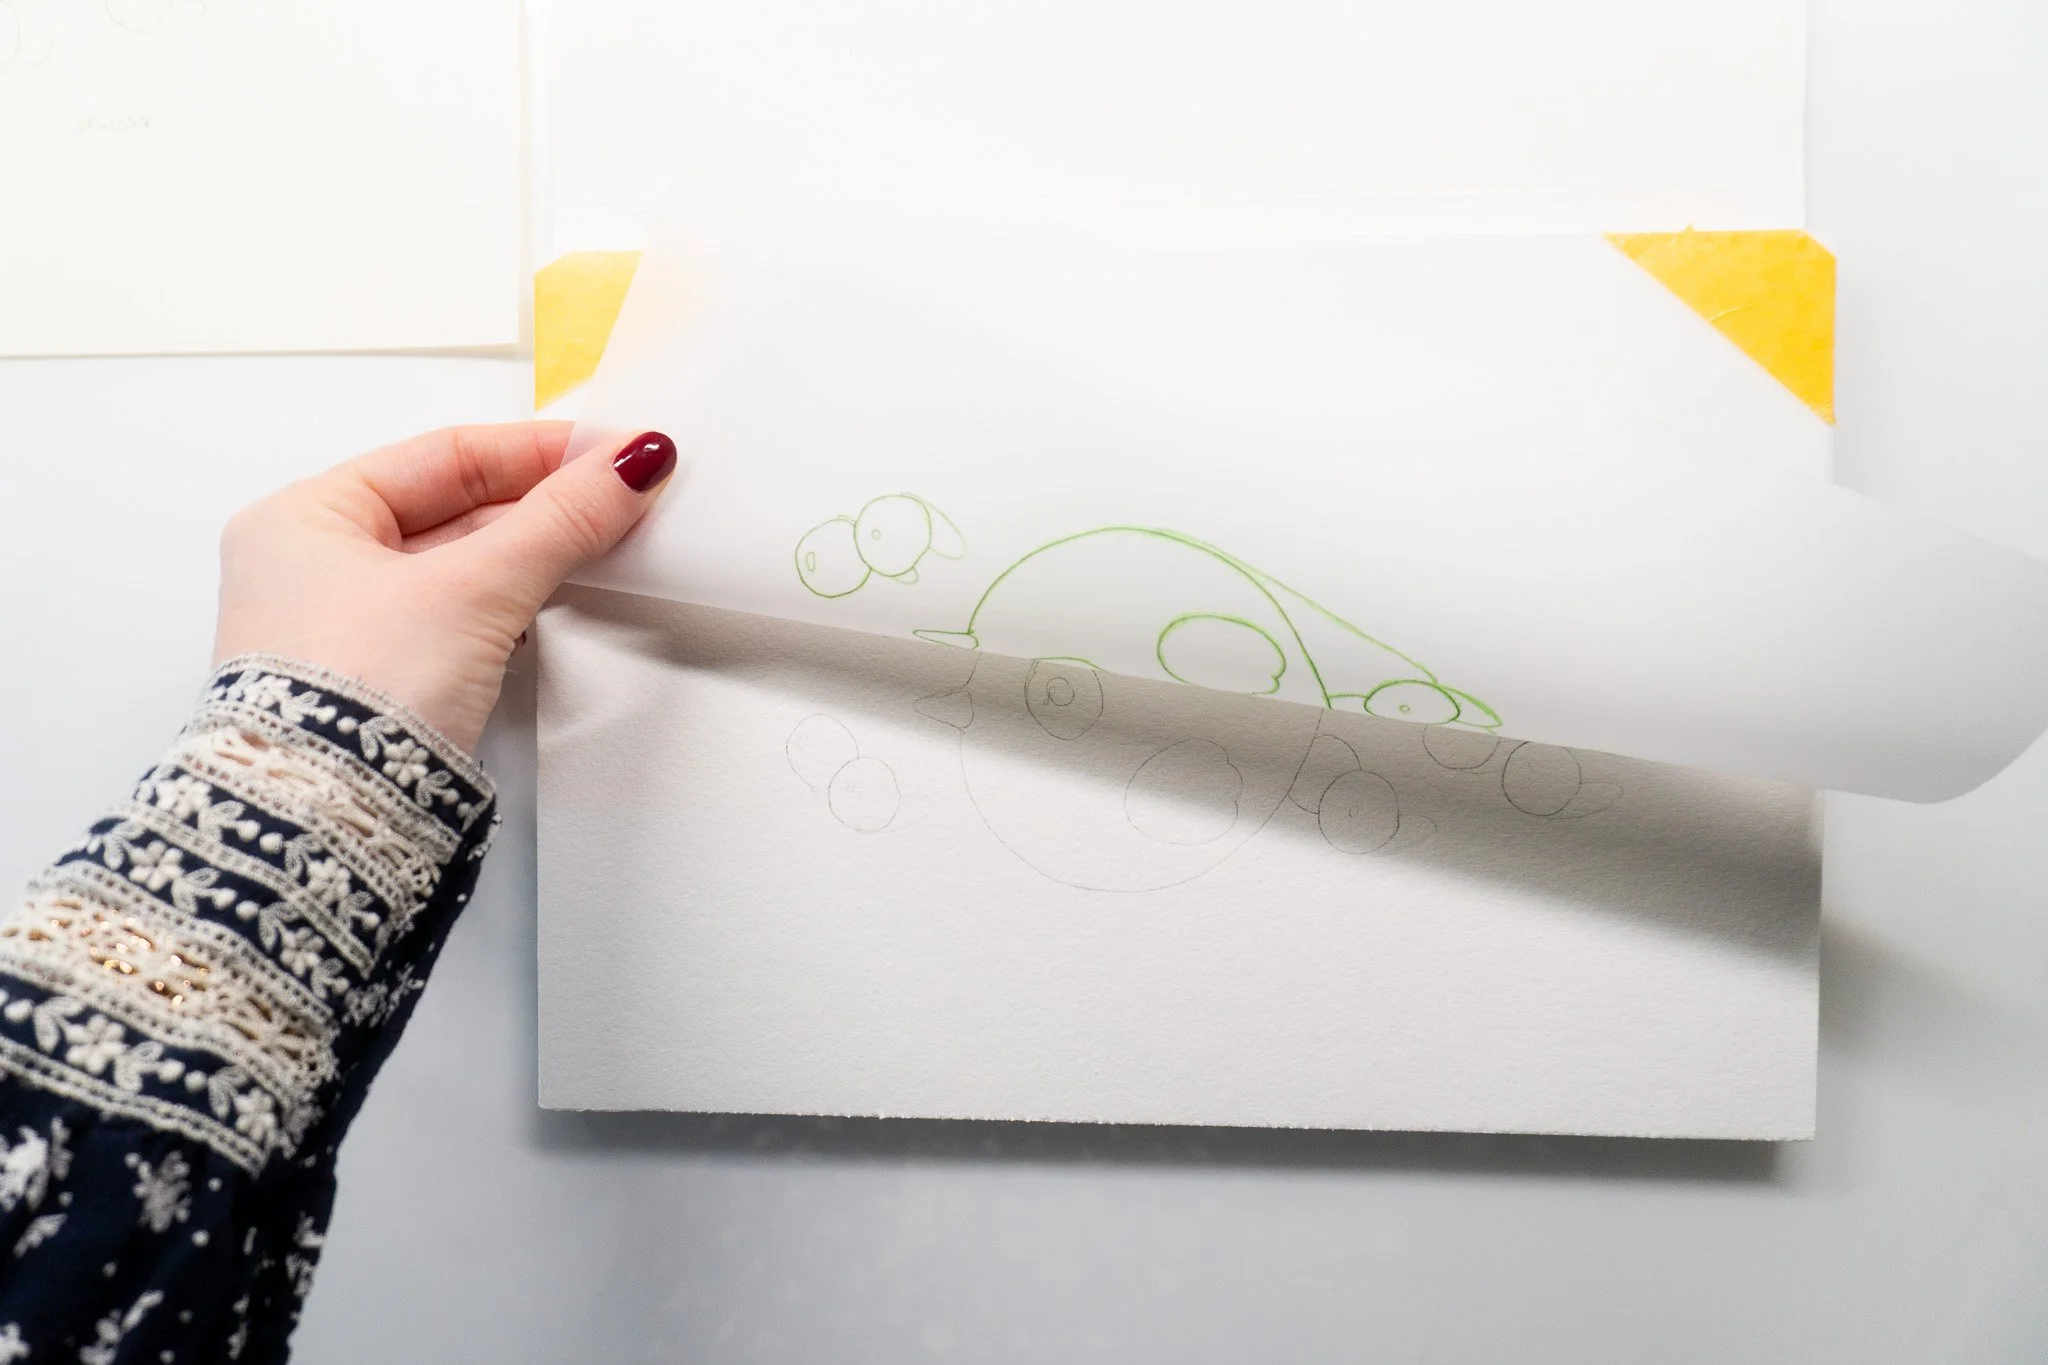
Once I have gone over all the outlines, I remove the tape on the bottom corners to lift my tracing paper and check the transfer before removing the tracing paper entirely. Keeping the top corners in place allows you to put the tracing paper back in place with minimum shifting if an area needs another pass to be transferred properly.
When everything is transferred as clearly as you want, you can fully remove your tracing paper. Don’t throw it away, it can still be useful!
Reusing Tracing Paper as a Mask
My food illustrations stand on a white background. Because of this, I like to protect the white of my paper against little accidents around my subjects, and the sheet of tracing paper I used to transfer my drawing is the perfect tool for that. Depending on your painting style, this might not be useful for you, so you can skip the next step and scroll to the end of this tutorial to see the result and advantages of my technique.
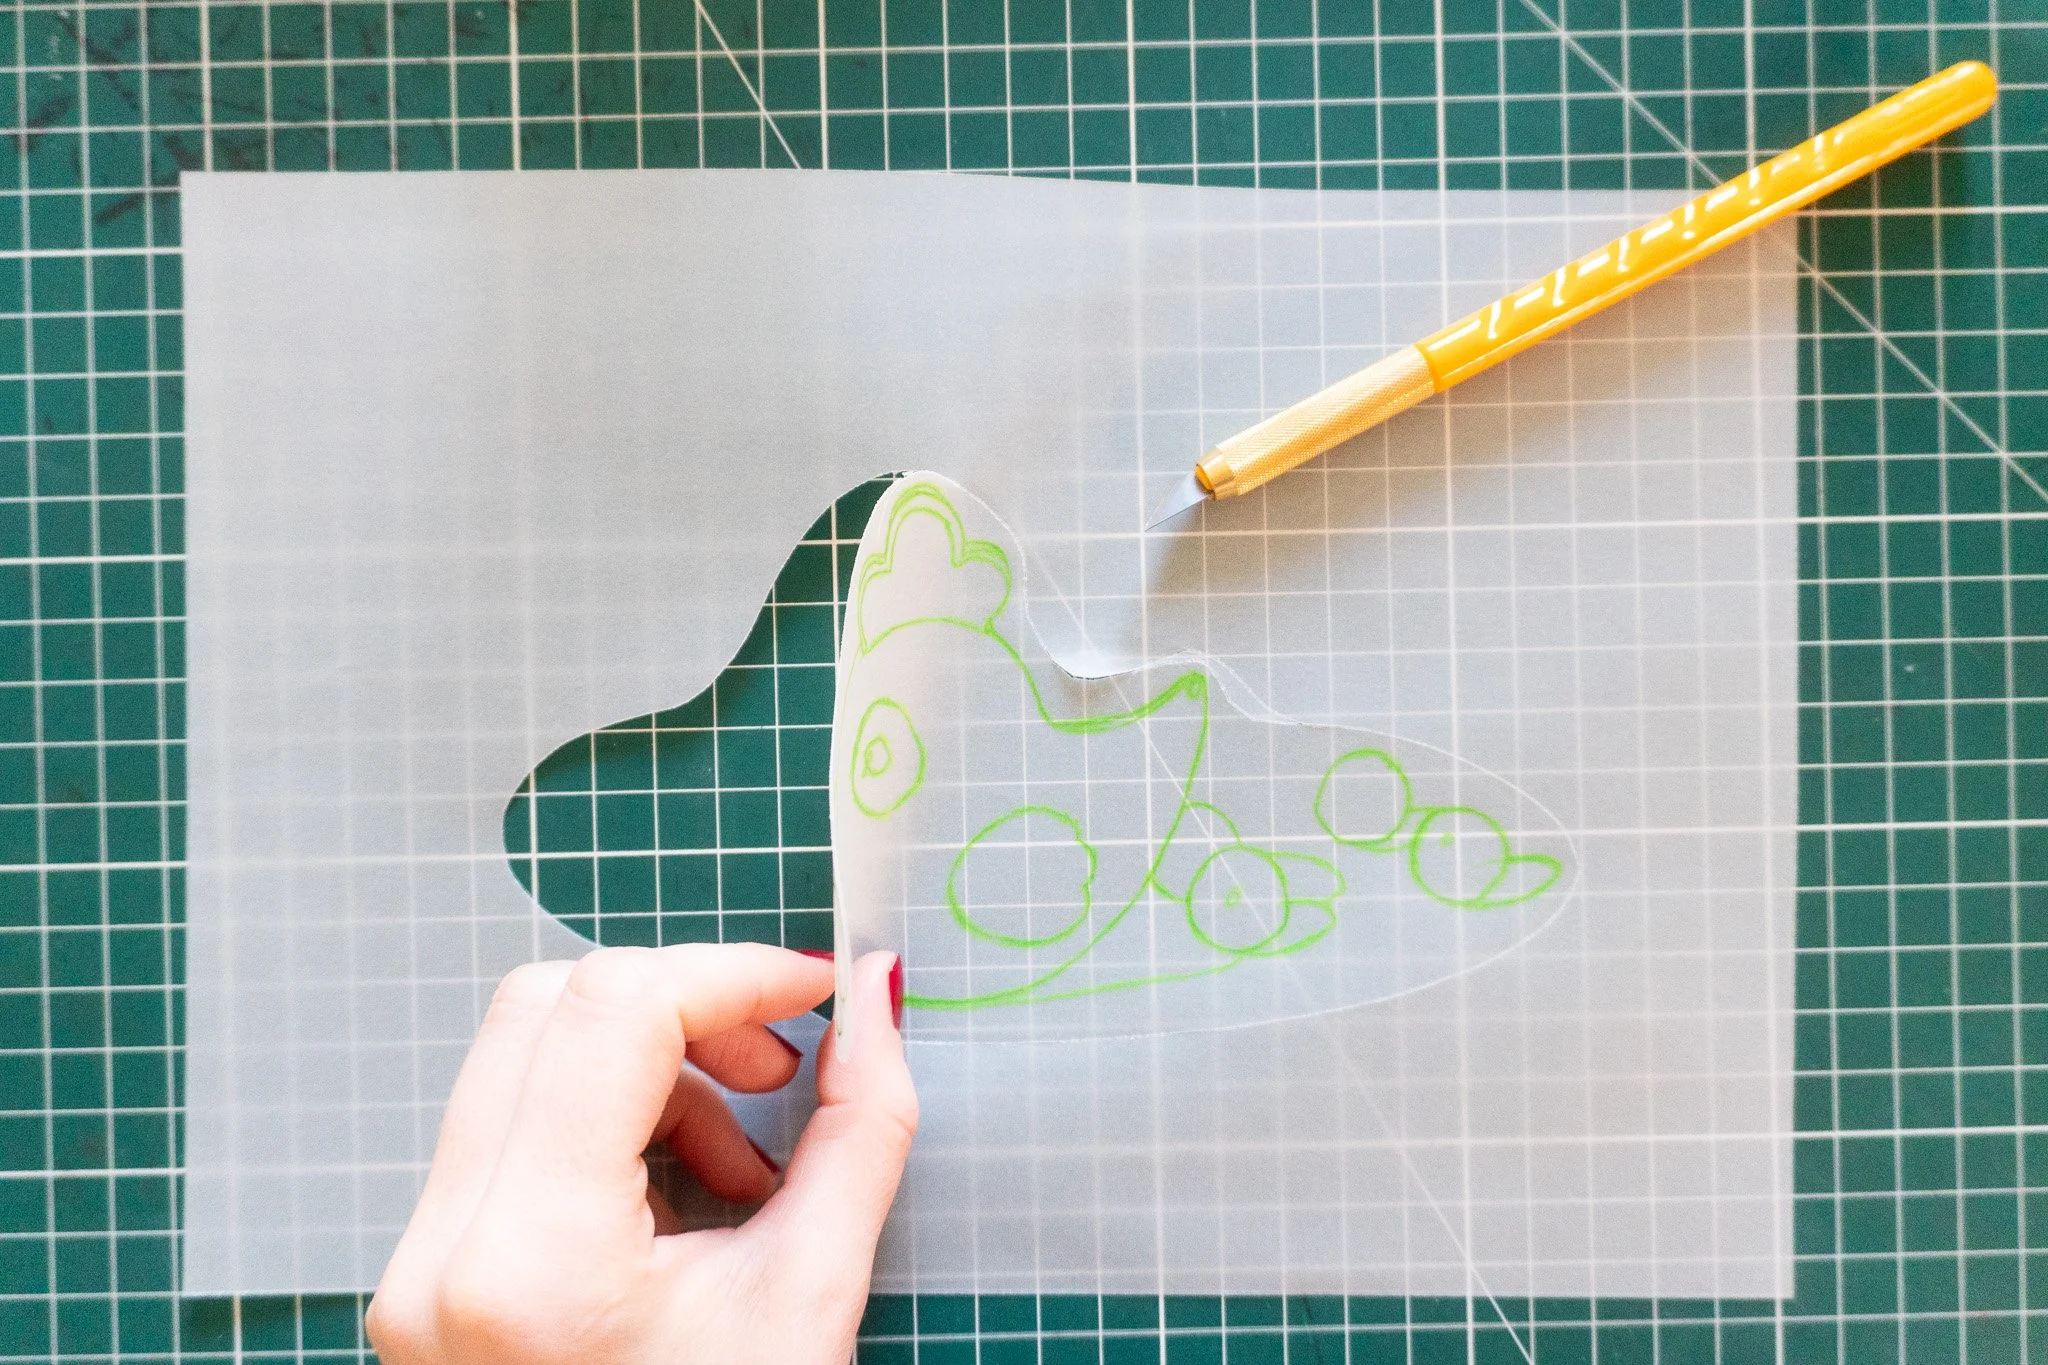
Cutting out the area that will receive paint
With an exacto knife, I cut a shape with rounded edges around the subject that I will paint, including any drop shadows. It is important to cut a shape with round edges and avoid any angle, as those might roll or bend and get in the way while painting.
I will then remove that shape and use the peripheral part as a protective mask around my subject on the watercolour block.
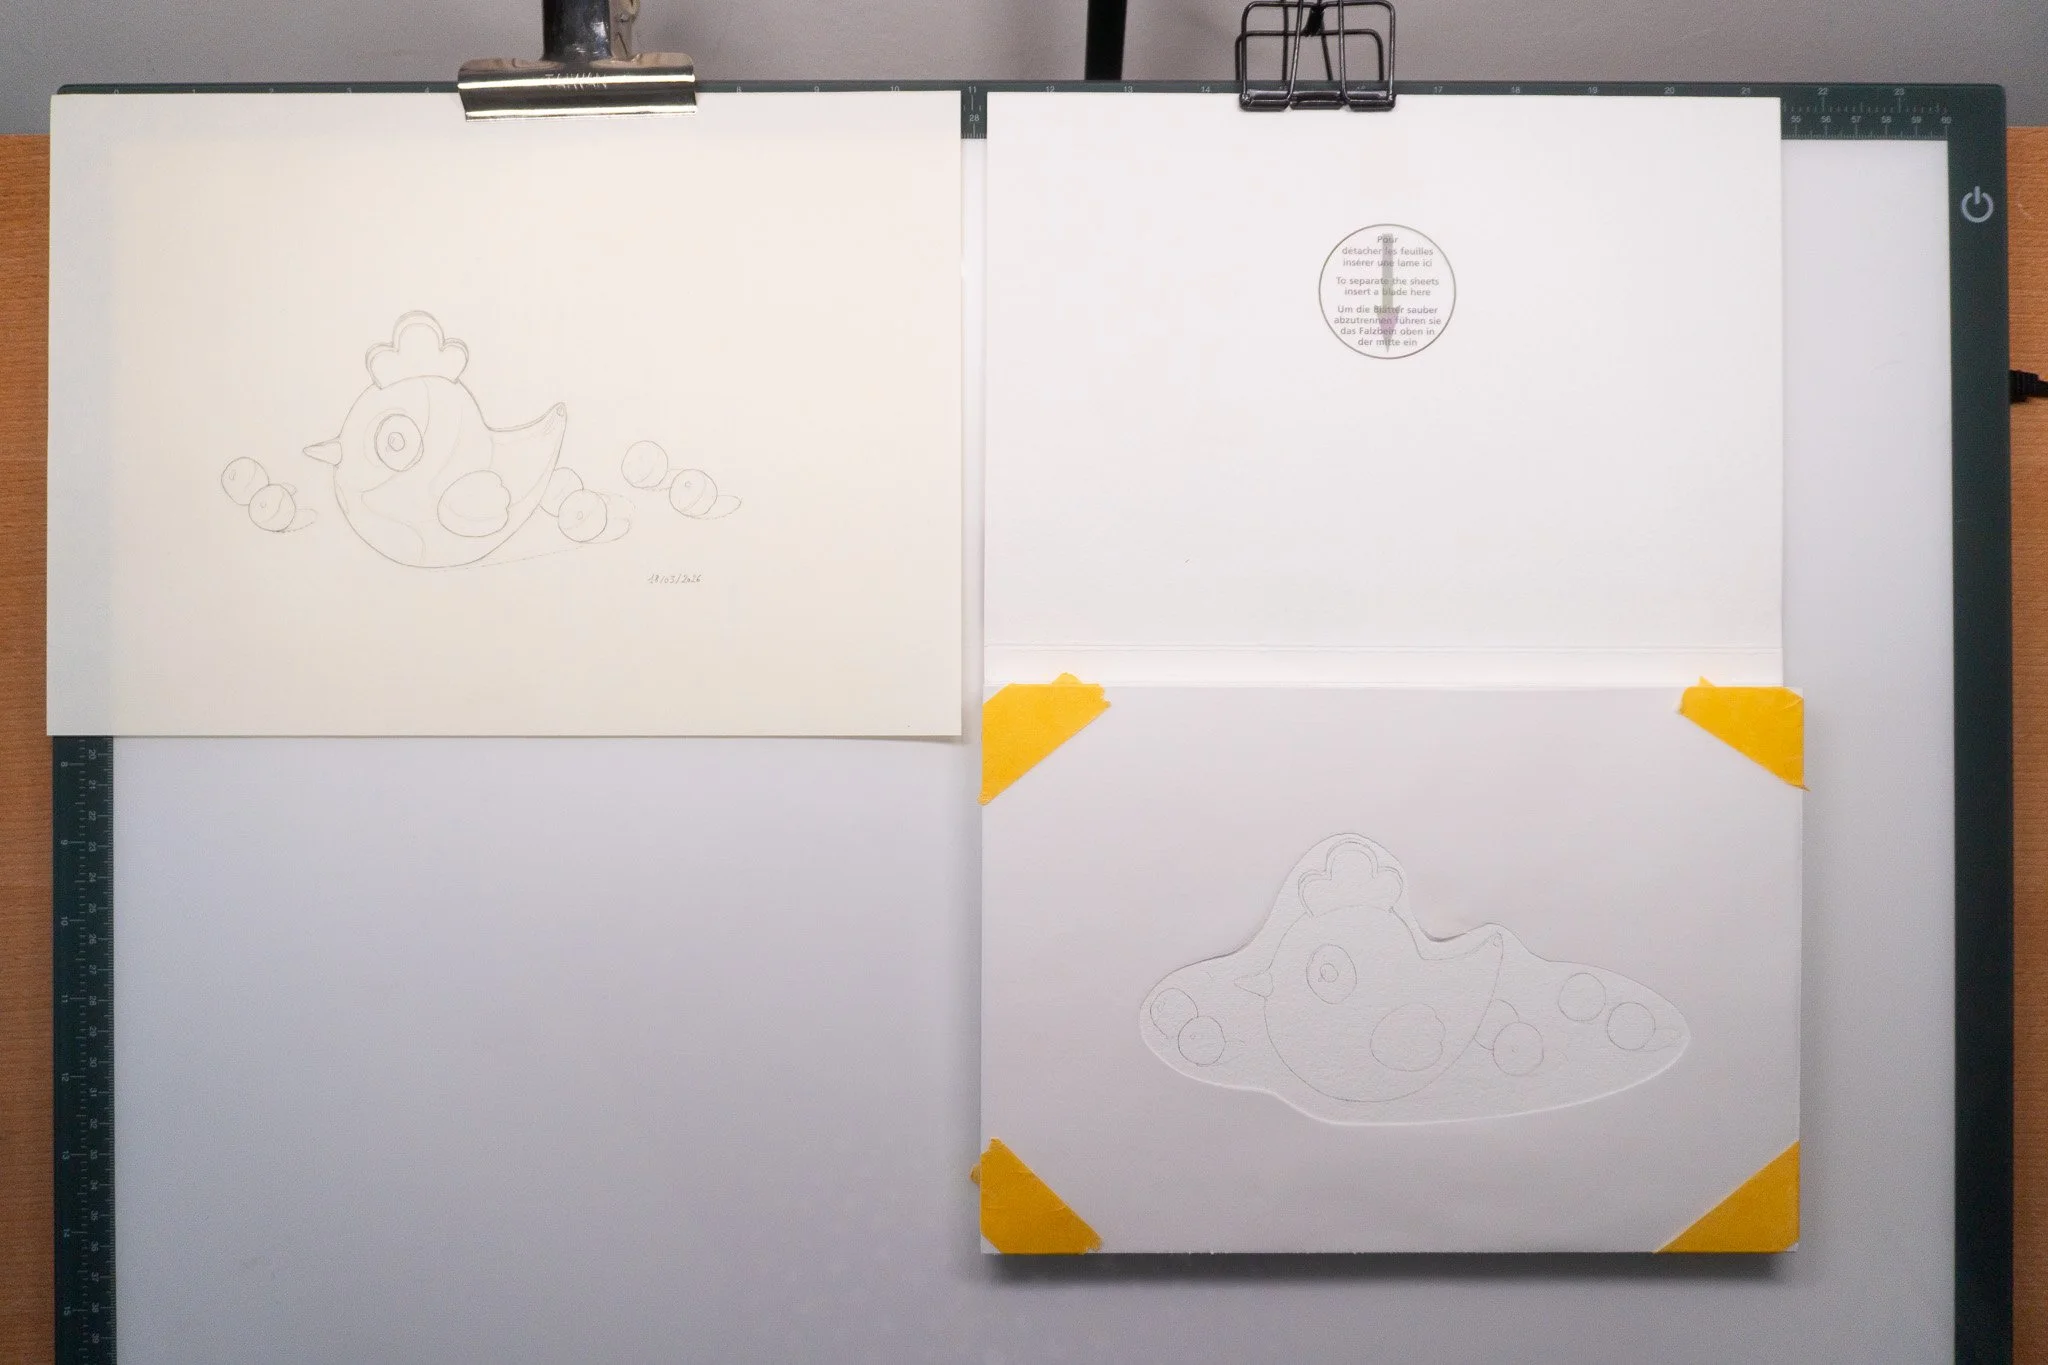
Drawing transferred and protective mask on
Above is what I end up with: my unaltered drawing on sketching paper, transferred in the same orientation onto my watercolour block without removing the sheet from the block, and my tracing paper mask fixed in place to protect the white of my paper around the subject.
One thing I forgot to mention is that I reused the same four pieces of tape during this process: minimum waste!
From there, you can gently erase your transfer with a kneaded eraser or crepe eraser if you want your outlines lines to be less visible. Be very delicate with it, and make sure your eraser is clean to start with.
Why Transfer Your Drawings
I don’t always transfer my drawings this way, and I want to finish this tutorial by encouraging you to figure out what makes the most sense with your artistic process and what you’re trying to achieve. You can simply draw directly onto your watercolour paper, and many artists do so without problems. Depending on the weight of your watercolour paper, you could also transfer your drawing simply using the light box and skipping the tracing paper entirely.
Here are the reasons why I use this process for my food illustrations:
I can keep my watercolour paper on the block, which removes the need for stretching my paper. Here I also happen to be using 640 gsm watercolour paper, so I couldn’t see through it with the light box anyway.
Preserving my initial drawing offers two advantages: I can reuse my drawing for another transfer if I mess up the painting, and I can refer to it during the painting process for indications such as highlights, terminators, and drop shadow placement.
My tracing paper becomes a very convenient mask, that I would have to cut out of a piece of paper anyway because I like protecting my paper.
If I were to use tracing paper alone without the light box, I’d have to trace my initial drawing from the right side, flip the tracing paper and trace over the same lines on the other side to get a reversed image that I would then transfer. Using the light box basically saves one tracing step.
I hope this tutorial will be useful to you, let me know in the comments if you give it a try!